Body Work
October 6, 2003
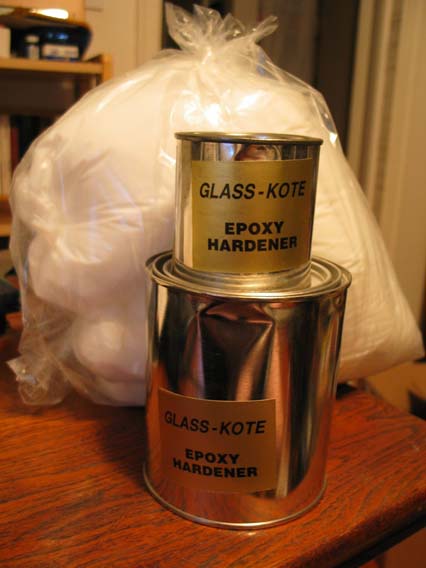
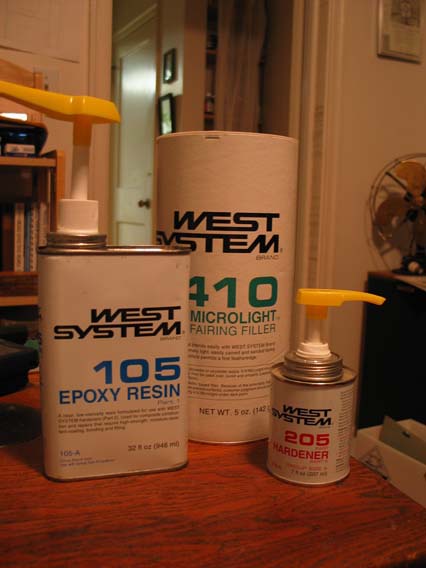
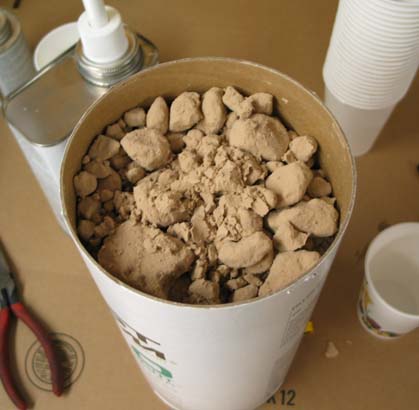
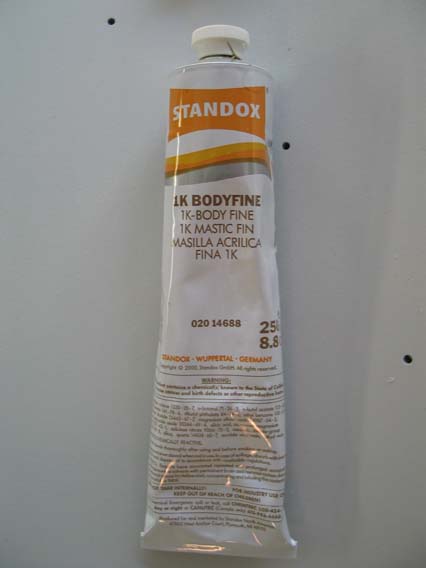
Although the "Factory Five Body Preparation Video" that was recommended by the Cobra Lads www.cobralads.com had not arrived yet I decided to jump into the bodywork anyway. At lunch time I went to True Auto Parts & Paint in bustling downtown Merriam and got some supplies. They sell DuPont paint and they also carry the Standox brand of primers that Charlie Bolinger recommended, and I like the guys there. Although I usually use PPG I think I will go DuPont this time using their Chroma Base line of paints, an acrylic urethane similar to the DCC system I am used to. I had them look up the paint chip for what I thought was Guardsman Blue and it seemed too dark. After asking on www.clubcobra.com a knowledgeable person there (thanks Ron) told me CSX 3111 is actually Sapphire Blue which is a 1966 Ford T-Bird color code G. (hmmm... wonder if that is the same code as on the '69 T-Bird I had in high school?). I'll check and see if that is really the color or not, there are so many blues painted on cobras and the differences are so subtle, this is going to be tough... I also followed a trail to get epoxy based filler (like bondo). Andy of Cobralads recommended West System and I had picked out products from their line at www.westsystem.com. I called their dealer in town and he didn't have everything I needed so he sent me to a place called Fanstastik Plastiks (using Ks for Cs is Kool). They were close to my dear wife Wendi's work so I paid for the goo and asked Wendi to pick it up. Somehow they decided to substitute the generic so I think I'll give them a call today and ask. Notice how both cans say hardener? The white bag is the powder you mix in the make epoxy in to body putty.
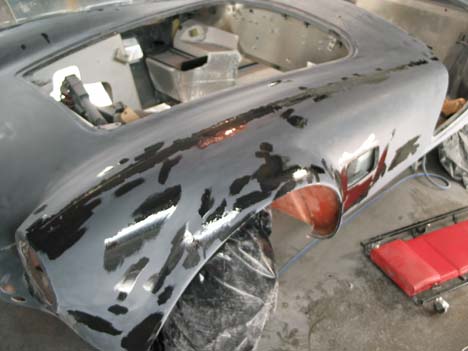
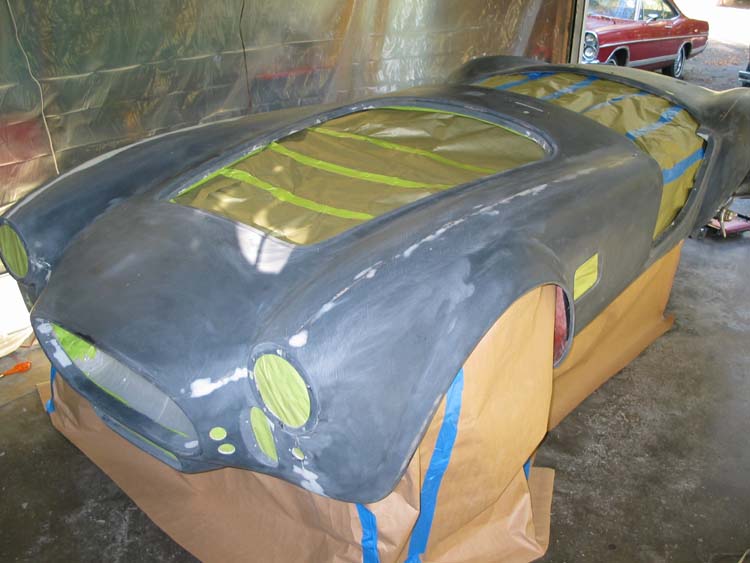
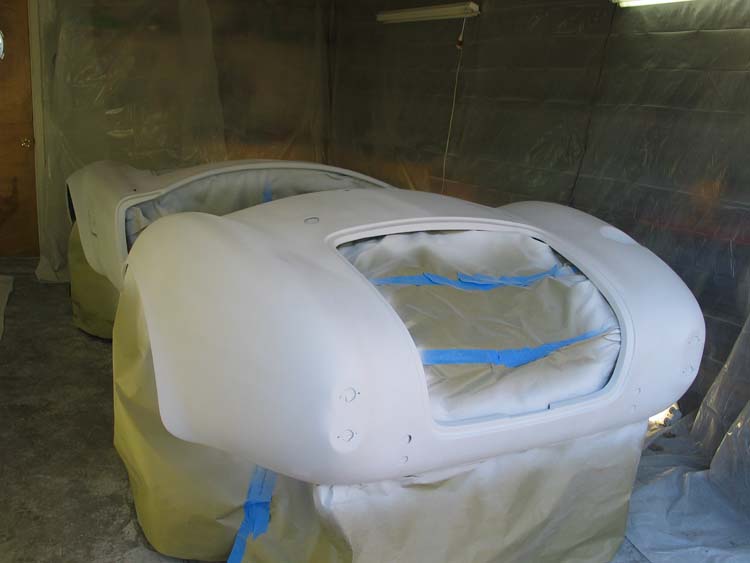
After work I started on the car, lots of work has been done to this point, but this is the first that felt like actual progress! A fiberglass cobra body is made up of a bunch of molded pieces stuck together, the seams where they join need lots of sanding and lots of filler.
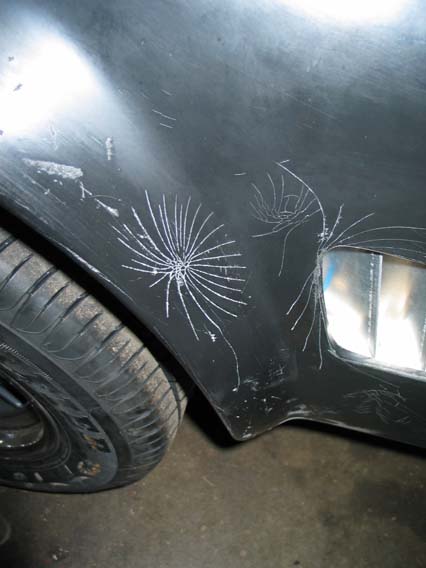
Another issue with my body is that most panels had epoxy gobs and spiderwebs all over them. I think the spiderwebs are cracks in the gel coat which may have happened when the part was removed from the mold.
I started out sanding down these seams with a DA sander and 150 grit pads. The conclusion I reached is that I need to sand the whole car to get rid of the goobers, globs and spiderwebs before spraying primer. The work went fairly fast and I got over most of the car last night. I still need to work the hood lip and do some hand work in various places before I start filling. It's messy work but it feels real good to be making progress.
October 7, 2003
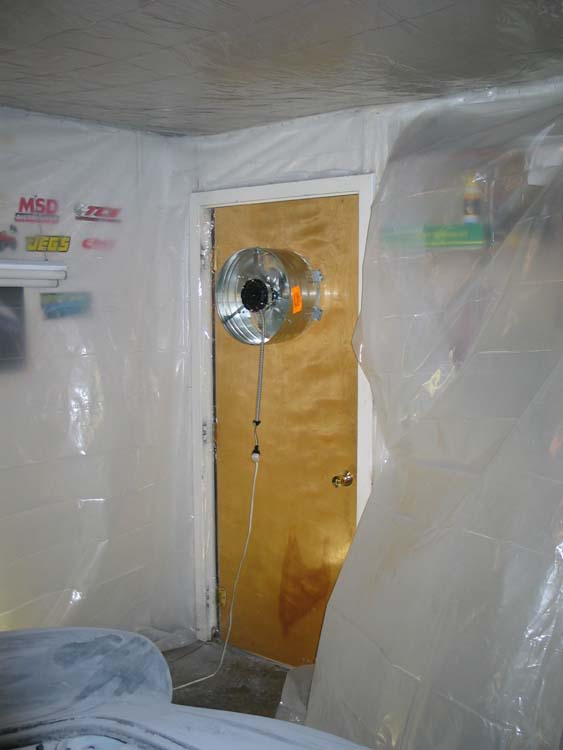
Wendi took back the Fantastik Plastik and they cheerfully refunded my money. We'll try to get some West System goo on thursday when the supply truck comes in at the boat stuff store. Also today the donated door arrived, thank you Jeff Linscott, and the first thing I did was saw a big hole in it for the exhaust fan. It worked out pretty good except I think I need to open up a couple more windows, it sucks my walls in.
Also today I ran around searching for Sapphire Blue paint. The DuPont guys (whom I genuinely like) found the paint chip for a '66 Ford T-Bird color code G but they did not have the formula to mix it in their Chroma Base product line. They swore they could tint it up for me but I felt a little hinky about it. I did have them mix me up a tiny sample of the color in enamel. Then I went to Overland Auto Paint, the PPG dudes. They recommended their DBC Deltron 2000 base coat clear coat system. And they were able to mix my color, so I'm leaning that way so far. The only problem is the two colors don't quite match... The PPG color is a little bit darker, judging by a paint blob. But I _think_ I like it better. I need to squirt some on a fender or something to know for sure. Will do that later.
October 8, 2003
Today we had cubscouts so I didn't get a whole lot done. I did finish DA sanding the whole tub, there is still some areas I need to sand by hand before doing the filling.
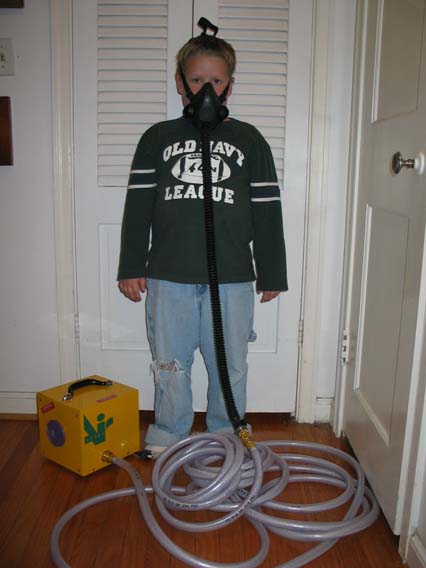
I also received my HobbyAir supplied air respirator. I found the best price at good old Aircraft Spruce & Specialty. In my younger days I would have ignored the paint manufacturers warnings about the hazards of isocyanates but I guess as I approach the big 40 I'm feeling a little less indestructible. So I ordered what appears to be a real nice unit. They had a model with an integrated full face mask but they had an optional piece of wire to hold it off your glasses... hmmm... don't think that sounds very good. So I got the half mask.
October 9, 2003
Today was a lot of preparation for filler. I got the West System goo at a boat store called Porte Des Voyageurs in Independence, MO. Then we had to go back after work because I had gotten the wrong pump for the hardener. The pumps make it very easy to mix, one squirt of hardener for one squirt of epoxy.
I also watched the FFR body preparation video. I learned some useful things from it, not 100% applicable but useful. It really came just in time because I had not considered using straight epoxy to fill a lot of smaller voids. Charlie Bolinger, the owner of ERA #664 stopped by to compare progress. He showed me some nice flexible sanding blocks. Charlie is in the car painting business so I always learn a lot more from him than he does from me! I should be able to start filling tomorrow, just need to gather some cups, sticks, and brushes.
October 11, 2003
Today I tried filling some of the minor voids in and around the seams with straight epoxy. They do that in the FFR video but not really the same way.
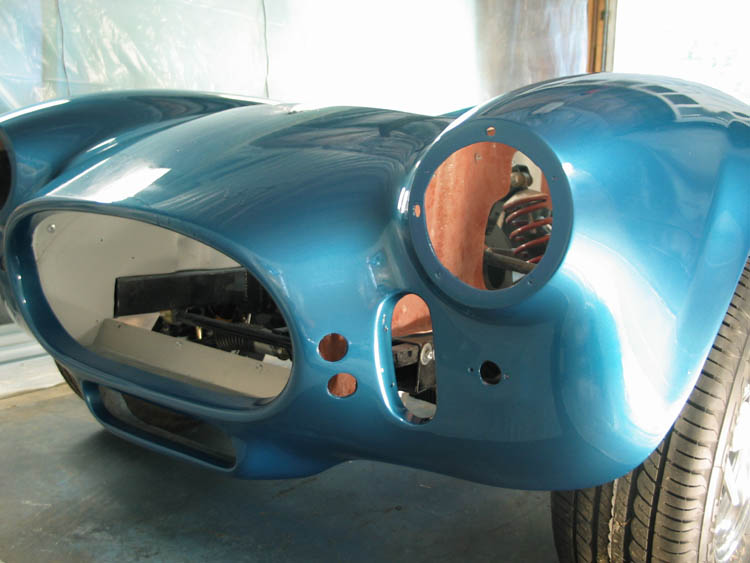
I was hoping it would fix spots like this:
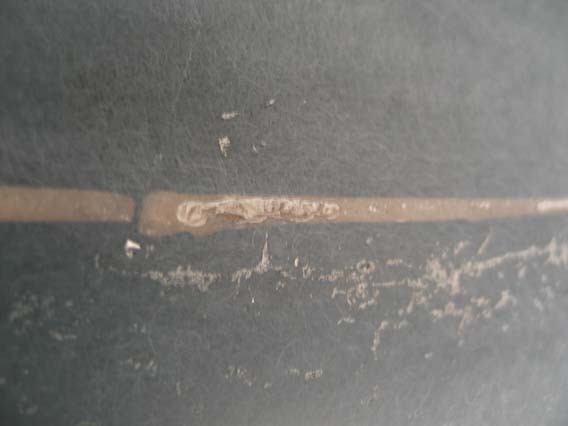
But in practice it's really too thin and shrinks so the hole remains but is slightly smaller. It also runs on anything but a horizontal surface, I really can't see any reason to use straight epoxy to fill unless you need the strength somewhere. Tomorrow I will mix in some of the 410 microlight, I opened the bucket, not exactly what I was expecting it to look like :) The lumps crumble to dust as soon as you touch them.
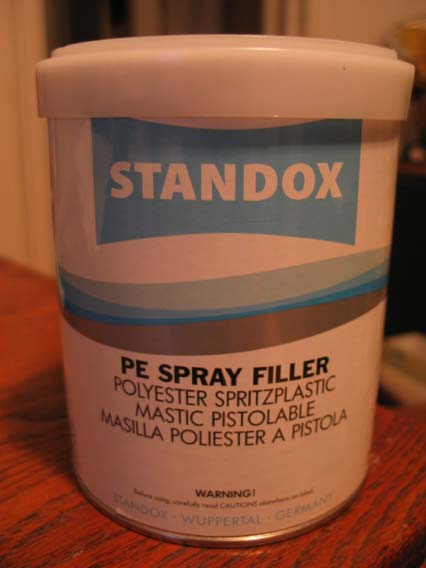
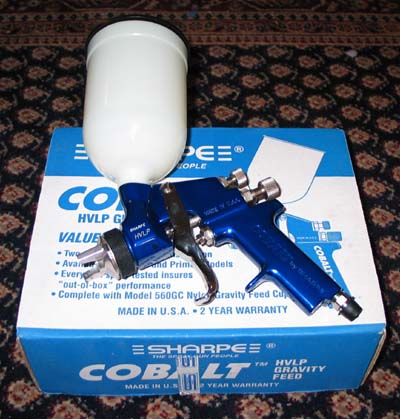
I also bought another spray gun specifically to spraying the primer. The Standox Polyester primer specifies a huge 2.2 -2.8 mm tip and my regular gun is a 1.6mm. The instructions say you can only reduce it by 10% and thinning a high build primer seemed pretty self defeating. Assuming this primer is as good as they say I think buying the other gun will be worth it on this and the other painting projects I have lined up. I bought a Sharpe 5823 (2.3mm) at Clark's Tools (kinda purty ain't it?).
October 12, 2003
I have put away the West Systems epoxy for good. I'm sure it is a great product and there are applications for which it is ideal, but this ain't it! I wanted to use it like bondo but it never worked that way. I added the powder and it did thicken up to a consistency like bondo, but when I applied it to the worst of the seams it sagged and took forever to cure. I applied it at around 5:00 a.m. and it still had not cured at 3:00 p.m. I have two fenders with that still stuck to them, hopefully I can get it ground off tomorrow. I really regret the time, effort and expense of getting this stuff. I was thinking that being epoxy it would provide a superior fill on a fiberglass car, maybe it does but I really don't have time to let it cure overnight for each little additional hole I find. In the mean time I went and bought some good old fashioned bondo and finished the other two fenders and started on the front facia. I made use of a couple of new sanding blocks I bought on Friday. http://www.theporman.com/catalog/default.php/cPath/25_4 is the product line, I bought the round one AF4404 and the long board AF4403. I really like both of them.
October 13, 2003
I had the day off work so I accomplished quite a bit on the cobra. Filling is pretty much done except for a couple of problem areas, the bottom of the body between the wheel wells, and the lip around the hood opening and trunk opening. All the areas have the problem of pop rivets being in the way, I've pretty much decided to drill them out, sand and put them back before paint. I got a little concerned about the goofy shape of the front of the door openings, this is something the driver and passenger will see all the time getting in. I went over to my buddy Jerry Adams' house to look at his car and I like his much better.
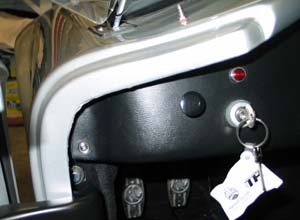
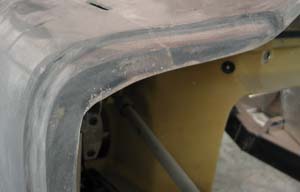
See how his is more or less a consistent width and mine looks well... not... ? So I've got some work to do to get that in shape. I'm fast approaching the time where I have to decide I'm done and it's time for primer. The body shop guys advised me not to be too fussy, the Standox primer (which is called spray filler) is so thick it will fill in most imperfections - he said he's shot it up to 3/16" thick! That'd close up your door gaps! Anyway, sounds like I am getting to that point.
October 15, 2003
Sand, sand, sand, sand, stir up some bondo, sand, sand, sand. That's pretty much the gist of it. Yesterday was Evan's Birthday so no work on the car, had a great party though. Charlie B. doesn't think I'm ready for primer / filler yet, he's probably right. I can feel flat spots and minor ridges on the tops of the fenders so I think I need to work them again. Charlie is coming over tomorrow to give me a hand in deciding what still needs work. I almost have the hood and trunk edges done. I think drilling out the pop rivets in a few places is unavoidable, you just can't sand around them or bondo with them in there. Last night I decided to just round the corner somehow and leave the tapered end.
October 18, 2003
Charlie Bolinger has been a huge help with the body work, thanks Charlie! He came over Wednesday and helped refine my long board technique and showed me how best to feel the waves in the panels. He said overall it looked pretty good but I might want to skim filler over the tops of the fenders. Today was a big day of work on the car because my dear wife Wendi took all the kids up to Iowa and let me stay home to work on the car! I redid all the fender tops and finished filling all the various places that remained on the car. All the fill sanding was done with 80 grit paper which either sticks onto the long board or wraps around the other blocks. I also got a new very flexible small block that was important for finishing the curved area between the tail lights and the trunk opening. When I think I'm close with the 80 grit I frequently would go over it all with the small block and 180 grit paper. The smoother surface helps me feel for waves better. The plan for tomorrow is to finish some shaping in the engine compartment with a dremel and hopefully also use it to carve the door opening mentioned above. Then cleaning, masking and shooting the primer!
October 19, 2003
Well no paint was sprayed today. Masking took MUCH longer than anticipated. I spent a good 5 or 6 hours on it and it isn't quite finished yet, I ran out of masking tape. I was a little handicapped, my original plan was to use an extra roll of clear plastic I had but that didn't work out. So I used some masking paper from home depot but it was only a foot wide. Got some package wrapping paper from kmart to do the skirting. Now I just need to finish the skirting from the rear wheels back. I also borrowed an air compressor from my buddy next door, Tyler Randall. I built some plumbing to use mine and his in tandem and it worked good. With the gun's regulator set at 40 psi I was able to hold the trigger open and they kept up. Supposedly this gun needs 13.9cfm at 40 psi.

October 20, 2003
Today over lunch I bought some 36" masking paper and finished the masking. I worked the early shift so I could start painting at 3:00. I had to open up a couple more windows in the garage door so that the sides of my paint booth didn't get sucked in by my exhaust fan. All the windows just have screen in them now, the allergen capturing furnace filters were too restrictive. I was able to shoot one pot of Standox primer / filler before a work crisis called me away. Boy that is some weird stuff. It's very thick and so far it has sprayed pretty "dry", it's real hard to get it wet. It also didn't fill pin holes very well. I suspect I'm doing it wrong and you really need to be able to spray a wet coat to fill holes. Could be my gun settings I'll call tomorrow and ask, maybe I should thin it some. It was starting to solidify in the gun which is very bad. I got it all cleaned out though I think. The supplied air respirator worked GREAT! I never smelled the paint until I opened the garage door. It was great to have cool fresh air to breath. The only hassle was keeping both hoses out of the paint and away from the masking. Another success was the dual compressors, no problem keeping up with the trigger pulled almost all the time.
October 24, 2003
It's been a crazy week, it's actually a surprise that I got as much done as I did. I'm solidly into block sanding now. I learned a lot about the Standox primer / filer.
1. It's expensive, $50 / quart. One of the guys at the paint store who paints fiberglass monster truck bodies http://www.bountyhunter4x4.com/ says he uses a similar product from evercoat that costs $50 / gallon. I'm too chicken to mix products on this car but will definitely try that on future projects.
2. ALWAYS have them shake it at the store. It's really thick and settles to the bottom. I did not stir my second can enough and wasted some peanut butter thick deposit at the bottom of the can.
3. It may not fill everything you think it should. It does fill 80grit sanding scratches really well and builds up good and sands easily. For some reason it wasn't so good at filling in pin holes and the spiderweb cracks I had. I think part of the problem is when I first went to spray it, the body was really staticy. I have since checked and Standox sells a anti-static wipe that would have been a good idea to use before the first shot of paint. I'm going to get some for the next shoot.
4. Always reduce it 10%. I shot one pot of it straight out of the can with no reducer in maybe 75 degree heat. It went on really dry and it literally was going off in the pot, I was pulling solid layers of it out. Since then I have always reduced it 10% and can shoot several pots without it solidifying. I'd say you should always reduce it.
I am filling pin holes holes with Standox spot putty, it works good and I'm getting rid of the little buggers.
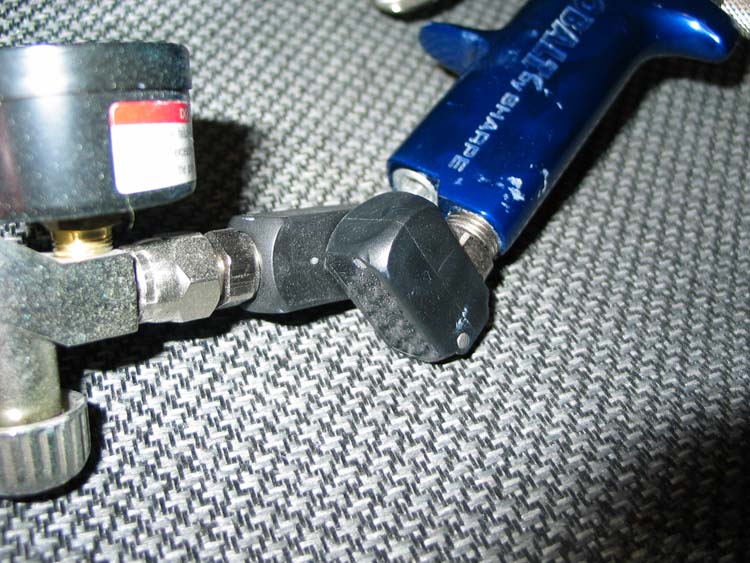
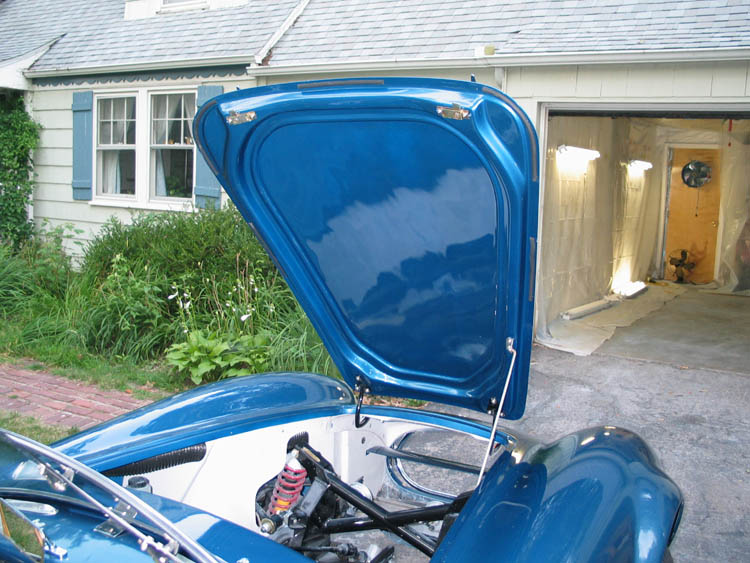
One of the best tool investments I've made is this little swivel that goes on the end of the gun! I was having trouble getting down low enough to paint the oil cooler scoop with all the geegaws hanging off the end of the gun and the hose etc. This helped a lot and also helps you keep the hose out of the paint on a long reach over the top of the car.
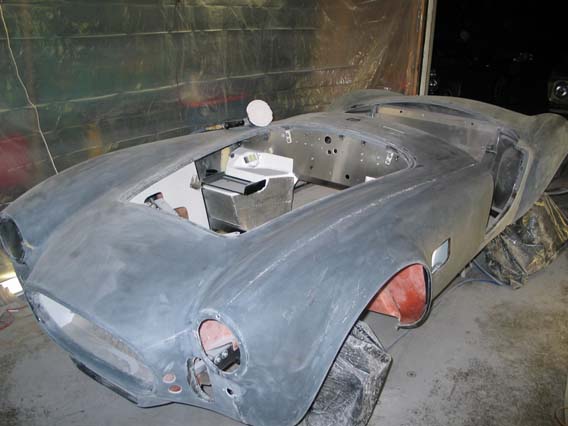
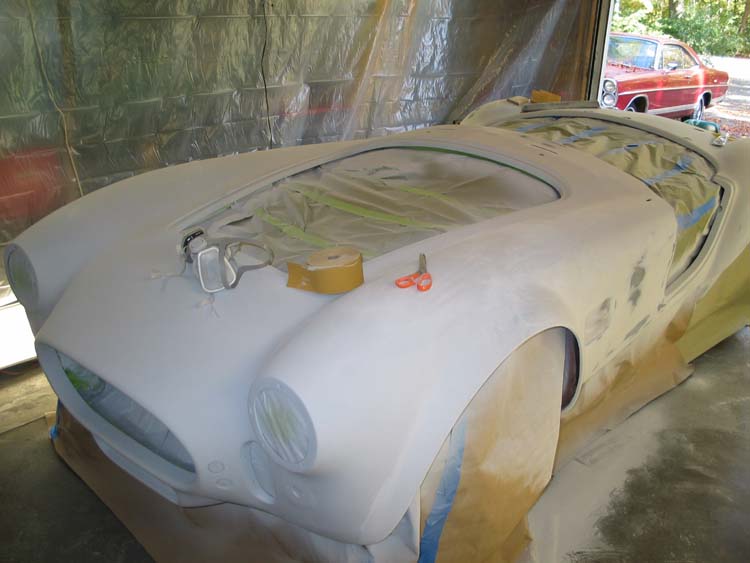
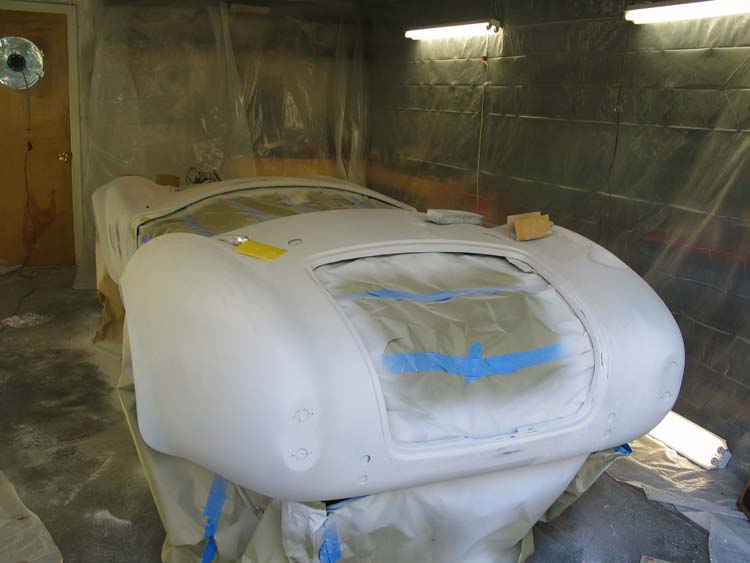
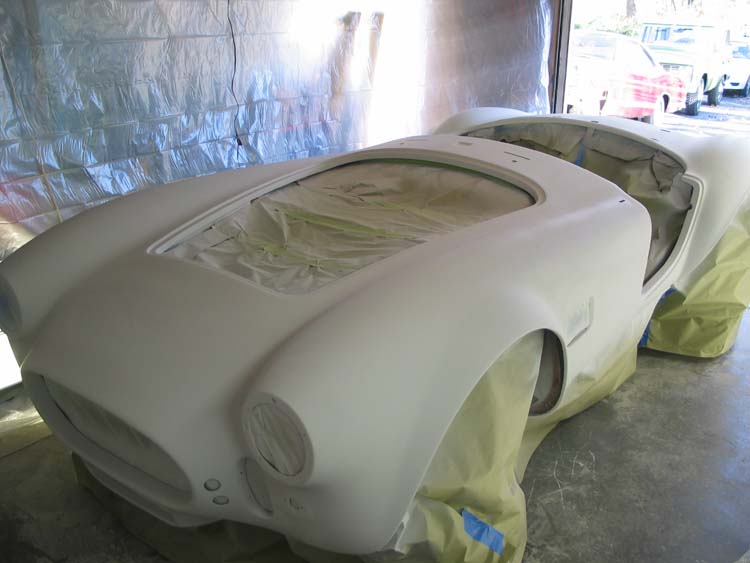
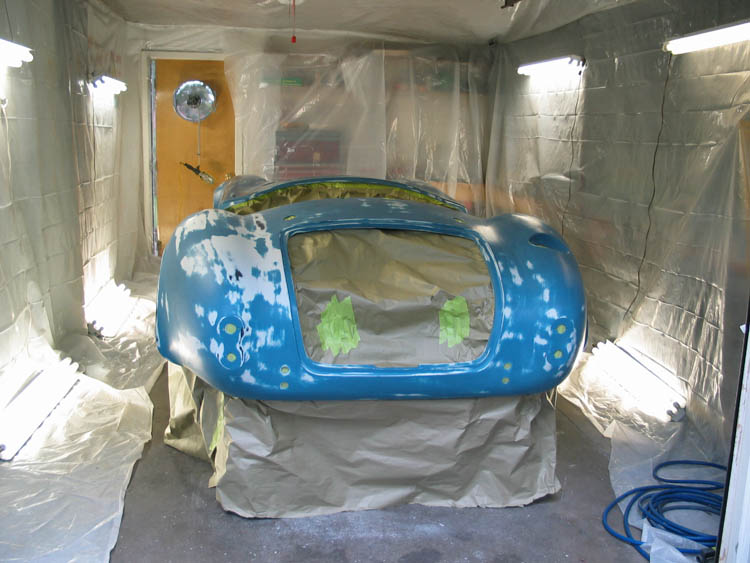
Here is what the car looks like now. It's really looking like something now that it's all one color again. I am going to block the whole car (I have been sanding through the primer almost everywhere) and then shoot the primer filler again and block again. I've been using 180 grit paper and it seems to be going really well. The primer sands easily (maybe too easily) and I can go pretty fast. I'm using the long board, the small rubber block and the super flexible small block. It's supposed to be cold here for the next few days so I may not be able to shoot primer again until Wednesday.
November 16th, 2003
It's amazing how almost a month can slip by with a project like this. I have been insanely busy (literally) at work these last few weeks and have had little time to work on any of my hobby vehicles. Also in the mean time I worked on the carburetor for the bronco and got the engine / transmission mounted in Red Car. I really need to get Red Car running so it's fresh engine and transmission don't go stale. Anyway, weather this week looks great. Highs in the 60s through Saturday. If I really kick it, is it possible I could see a blue cobra by then? I don't know, we'll just have to see.
I got a lot done on Sunday, finished block sanding the whole car and did some additional filling of holes etc. I honestly think it's ready for a final shot of polyester primer. Then block sand again with some finer paper to hopefully not go through again. The amount of effort here really comes down to how smoothly I can get the primer to go on.
I'm going to compile a list of "Top Ten Things Charlie Told Me To Do, But I Didn't, And Should Have". Here are a few gems...
1. Work one panel at a time. I tend to work all over the car, walking around and around. The biggest problem with this and doing something like filler, is once you get the filler all mixed up you forget where all the little fill spots are. Likewise in sanding the filler you have to run around and find them all again. I'm sure I would have been more productive working a panel at a time.
2. Be careful with a DA sander. I should have put that tool away much sooner, it's fine for removing the fiberglass boogers from the body but it can do too much shaping too fast to control. It really should not be used to shape filler.. Always use an appropriate sanding block and 80 grit paper for that, I had to redo all of my seam fills at least once because of that.
3. Spot putty shrinks after a couple of days. It does. Use bondo.
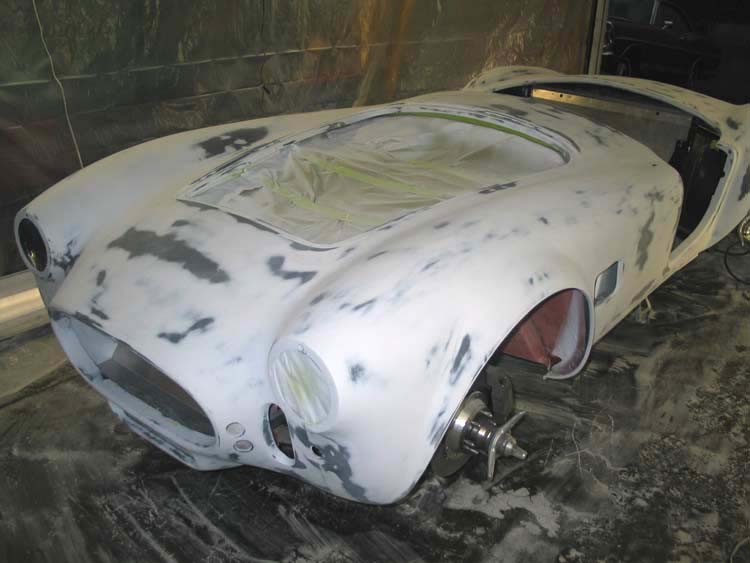
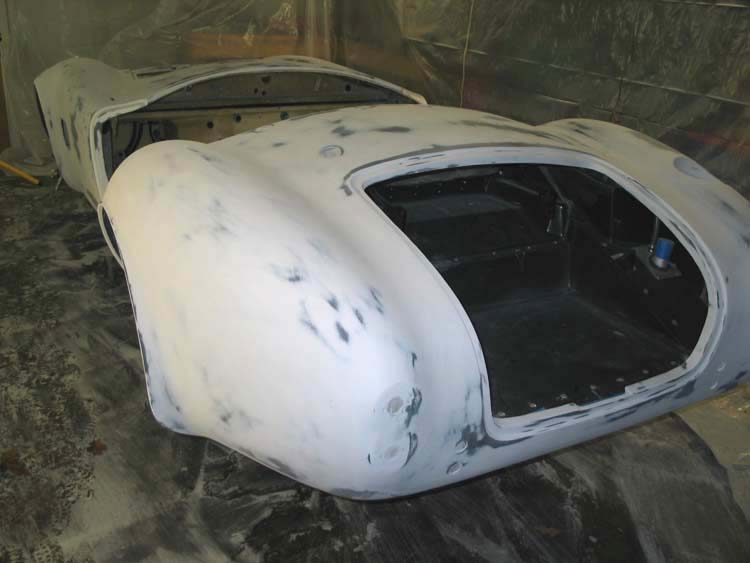
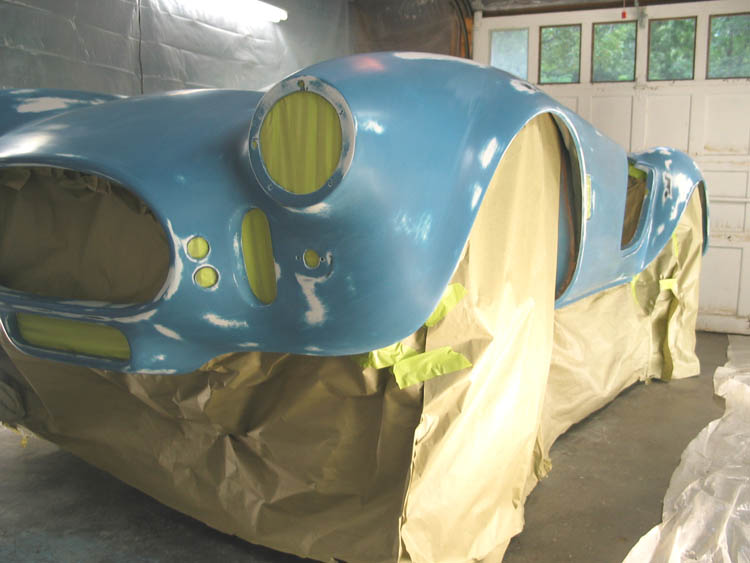
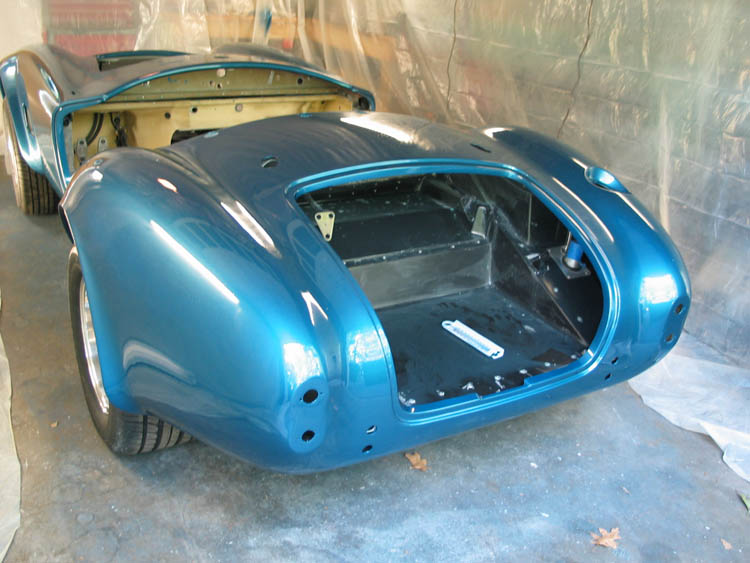
So here is the car as it sits at this moment. I have cleaned up the sanding dust and need to redo almost all the masking. The original masking method didn't let me spray under the edge of the cowl and behind the seats. I also canned the skirting so that I could clean under the car. I blew the dust around with compressed air and then swept and mopped the floor.
November 20th, 2003
I took today and tomorrow off of work so I could try and get the tub painted before the first snow. Today I shot another round of the Standox primer/filler and the car is once again all white, used about a quart and a half and put it on I thought pretty thick. While that dried I went to the paint store and got the PPG paint. The bill was $432, yikes. The color is Sapphire Blue which is a 1966 Thunderbird code G. The products from PPG are Deltron Epoxy Primer DPLF (it's blue), Deltron 2000 DBC basecoat, and Concept 2021 Clear DCU. There was some question about how the primer sealer would react to the Standox. In retrospect I'm not really that impressed enough with it to have risked mixing product lines. My fingers are crossed :).
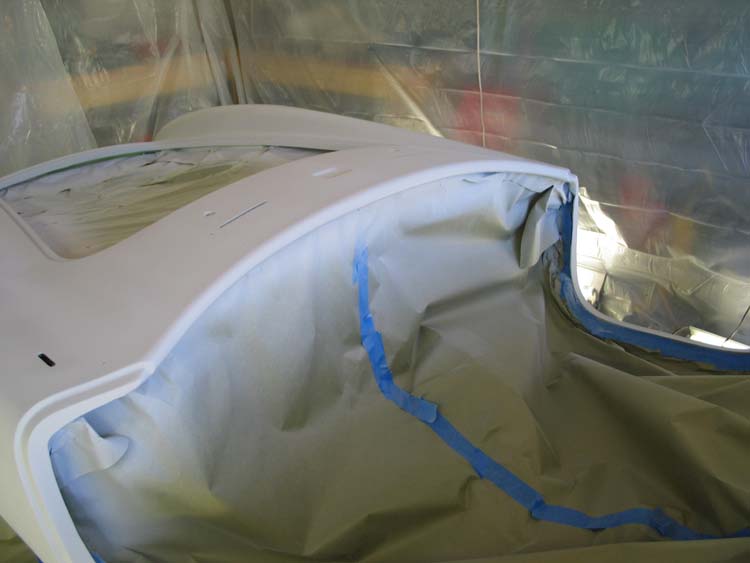
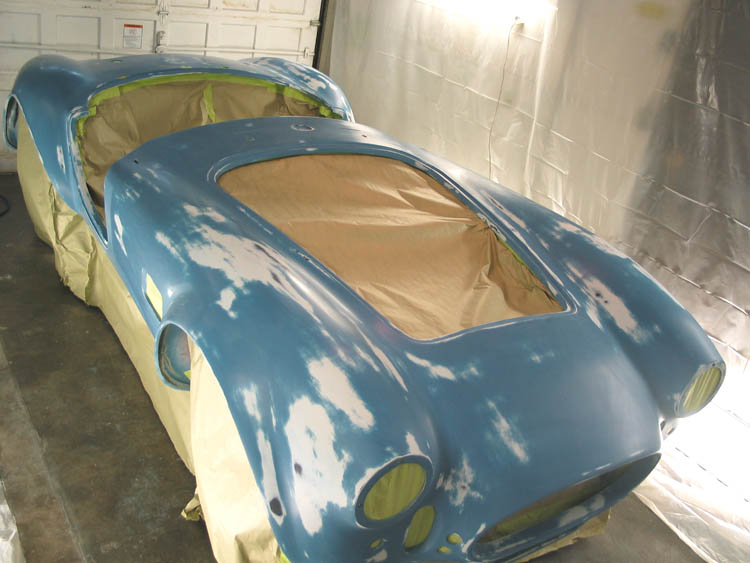
Tonight I started block sanding the whole tub again. I sprayed on a guide coat of some cheapo spray paint and started with 180 grit using mostly the flexible small block. Then sprayed another guide coat and this time used 400 grit. At this point I've got the front half of the tub done with 180 and some of the nose done with 400. Once you finish with the 400 it looks really good. Hopefully tomorrow morning I can finish blocking and start shooting color after lunch. Temperature should reach 60 tomorrow which is the bare minimum for the products I'm using. I hope it all works out okay....
November 21st, 2003
You know what they say about all the best laid plans... The weather man didn't come through today, our high was 55 degrees so it was too cold to paint. The paint store guy says we need 65 degrees or the urethane catalysts won't work. We have a new plan for tomorrow, two Vornado heater fans brought the room up to around 70 degrees so they will be used all day tomorrow to hopefully get us where we need to be to make it blue tomorrow.
The remaining block sanding went well. I switched to 240 grit for the first pass, which may have been a little more difficult, but it made the 400 grit pass very easy because there were less scratches to work out.
November 22nd, 2003
Well, it's a blue, but not the blue. The first product to go on was the primer / sealer PPG DPLF. I messed up, I should have reduced it more and it went on rougher than it should have. The current thinking is I need to wet sand it after it has dried over night. The good news is the heaters did a nice job keeping it near 70 degrees in there all day.
December 3rd, 2003
Well, after an attitude and holiday induced hiatus I'm back to sanding the blue goo off. Boy this stuff is hard to sand, it gums up the paper and the build up can scratch deep. I've tried almost every combination of wet / dry / different grits. You really need to find something that won't gum up wet sanding. My most productive so far is to do 220 wet followed by 600 wet. I use a spray bottle to apply the water and frequently spray with one hand while sanding with the other. I'm going to get some more 400 today and see if that works better. The 220 can scratch if you aren't careful but the 600 alone is way too slow. I'm doing large areas now and it's going pretty well, I'm not looking forward to the hood and trunk lip though. For the next round I'm going to switch to the 401 (slower) catalyst and use the reducer. Lessons learned: take your time, don't get in a hurry, and if it doesn't look right it probably isn't so don't paint the whole car that way!
December 15th, 2003
The process of 400 grit wet seems to be the way to go. I'm maybe 1/3rd done, many hours remain. It's been fairly cold here, in the 40s during the day. The two heaters can't bring the room up to 65 degrees for painting so I bought 2 more. But then I'm having power problems and need to run extension cords from other parts of the house. In the mean time I'm getting nervous about Red Car just sitting there with a newly rebuilt motor and transmission, I really need to focus on getting it running for a while. I probably need to be realistic about the possibility that the cobra won't be done by my 40th birthday on February 22nd, 2004.
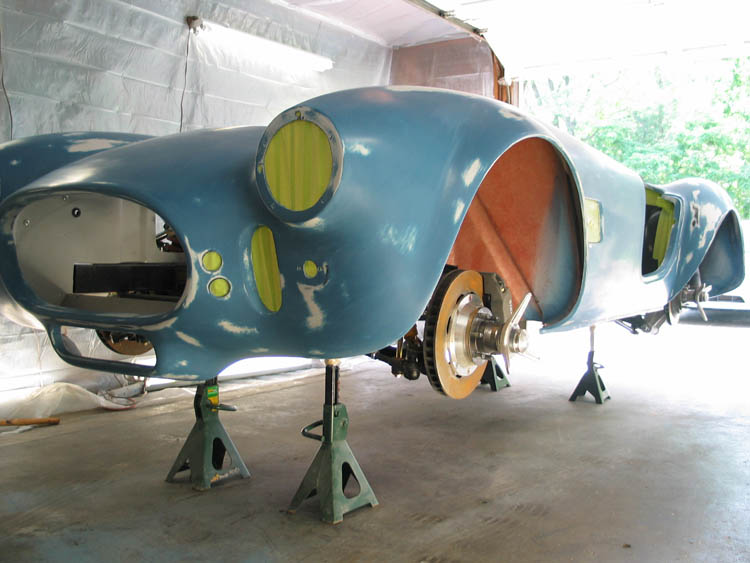
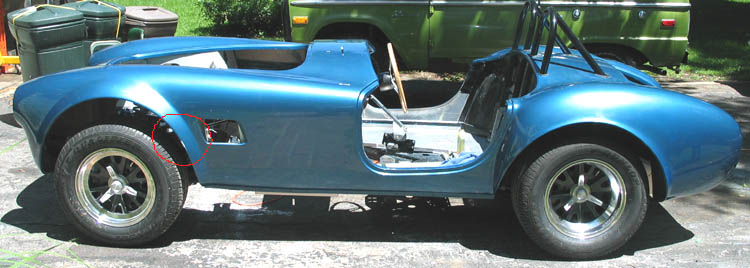
May 22nd, 2004
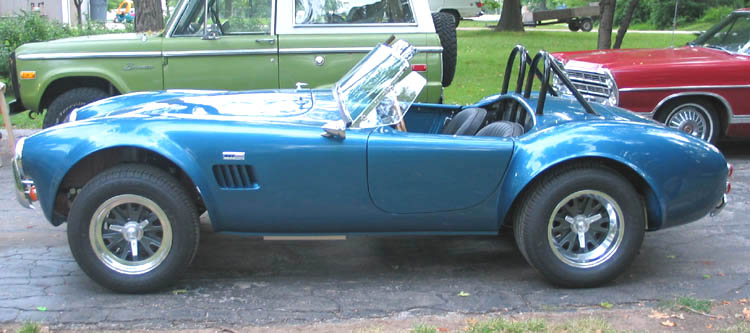
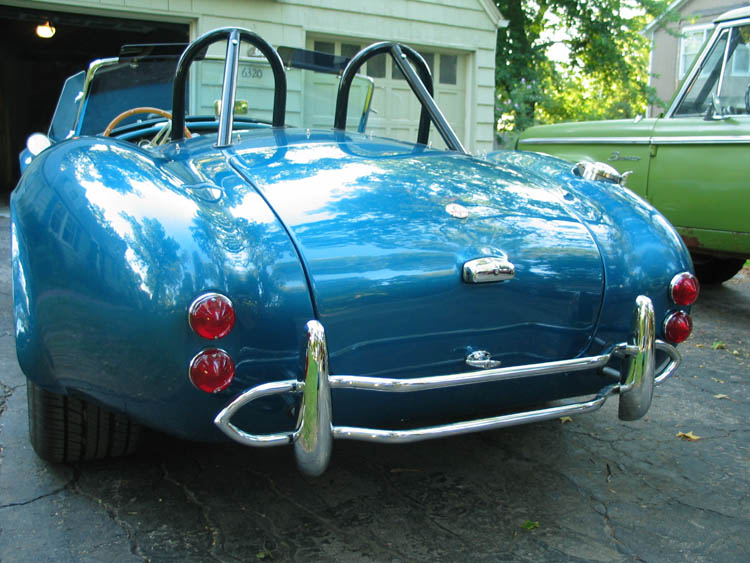
Over the last couple of weeks I've managed to clean the paint booth back out, pull off the old masking and put the cobra back on it's wheels so I can roll it around again. Today I drilled out the two rivets on the side of the engine compartment. I had been working around them and was going to paint over them. But Charlie's #664 looked good I thought with them just polished, so I'm going that route. I also started sanding again, still with 400 wet but it seems to be going easier now. It shouldn't take more than a few days to get back over the whole car. Charlie's car is done by the way and looks awesome. Note the 17" wheels:
June 2nd, 2004
Well I finally got all the blue goo sanded down again ready for the next and hopefully more successful round. I did most of the wet sanding outside to minimize the mess in the paint booth and to enjoy the nice weather. Hopefully it is even smoother now than when I first shot it. Next I'll move it back into the paint booth, put it back on jack stands and mask everything off again.

June 28th, 2004
As of last night the cobra was back in the paint booth being taped off. I put it up higher on jack stands this time, hoping to make the job of masking the bottom skirt easier. I just hope I don't knock it off while I'm at it. How embarrassing would that be? Don't know if I'll get to paint this weekend or not, we'll see.
July 4th, 2004
All ready for painting. I plan to do it tomorrow if the weather is decent. I'm a little concerned about the humidity, temperature should be pretty good. The first step is the epoxy primer sealer, that will need 90 minutes to dry. To prevent the problems I had before I'm using the slower hardner that requires a 30 minute induction period. I also have the reducer this time so I'm fairly confident it will go well. Then the base (color) coat which needs 15 minutes to dry and I need to do the clear coat within 24 hours. If all goes well it should take no more than half the day.
July 5th, 2004
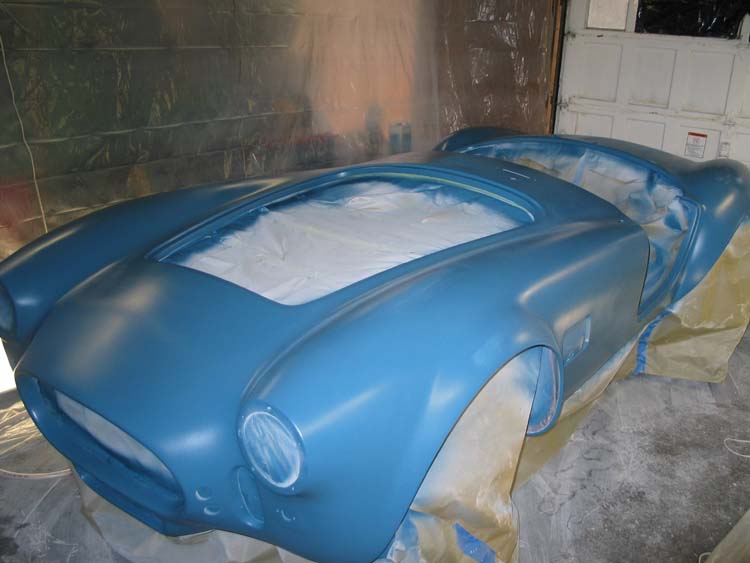
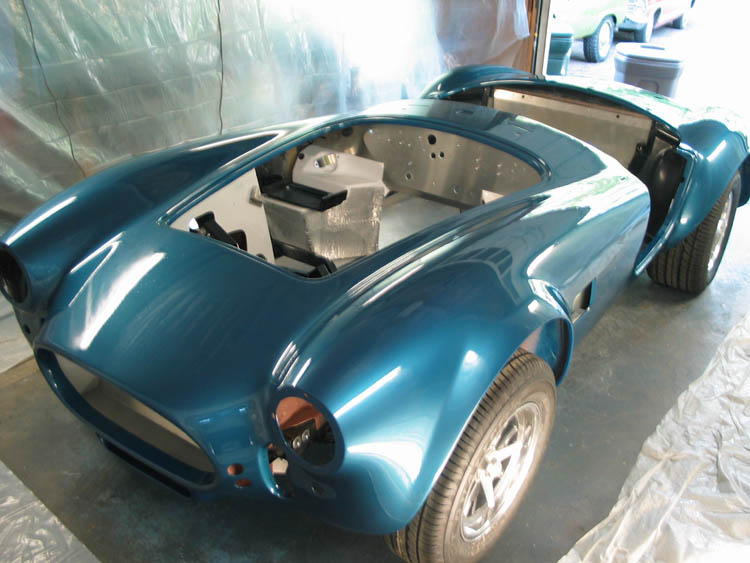
It's painted! It took me from about 7:30 - 12:30. Everything went pretty well. All the products worked great. The first step was the blue epoxy primer PPG DPLF with the DP401LF (slow) hardner and DTV Reducer. Next was the DBC Deltron 2000 base coat. This went on nicely although it was hard to tell the coverage with not great lighting and blue under it. I sprayed 3 coats more or less of it. Next came the DCU 2021 Urethane Clear. This stuff worked great although I probably took the "2 Wet Coats" a little too literally as I had some runs. Next time I think I'd try to put on a lighter first coat and full wet second coat. The second coat seemed to take a lot less paint than the first. It does look nice from a distance, I really like the color, but... there are many multiple instances of every paint problem known to man! There are lots of runs in the clear, dust, bugs, orange peel and even some water that dripped from the air hose. I think (hope) all of these can be fixed in wet sand polish step, we'll see. I can only dream what it would be like to get a beautiful clear coat without polishing. Like I said the products worked great, but me and my paint booth let them down. I could have used at least twice the light I have, I had trouble seeing the base coat and then trouble seeing the clear. There was a fair amount of dust too. It was windy today and all I had were screens on the air intake. Opening the garage door over the wet paint probably wasn't the brightest idea either. Anyway, it's painted, with work I think I can fix it, all in all I'm very happy.
July 7th, 2004
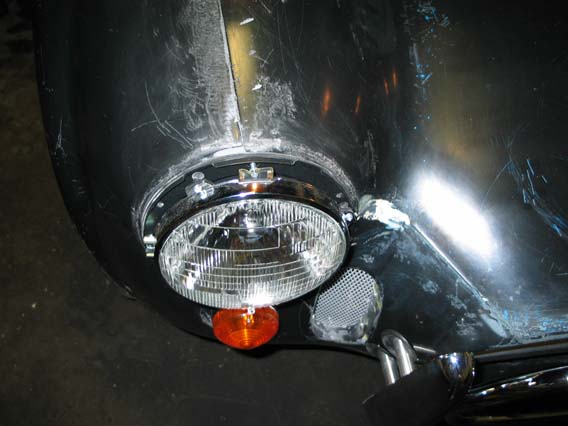
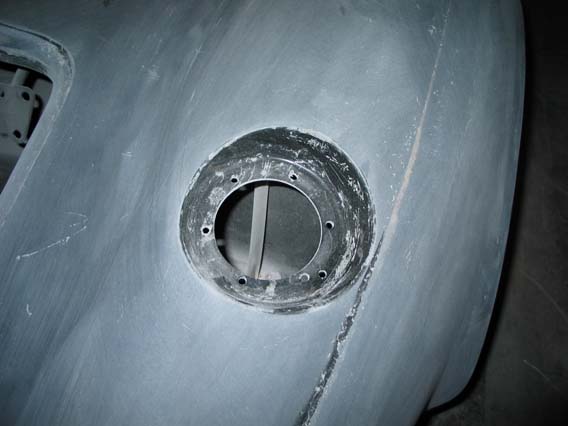
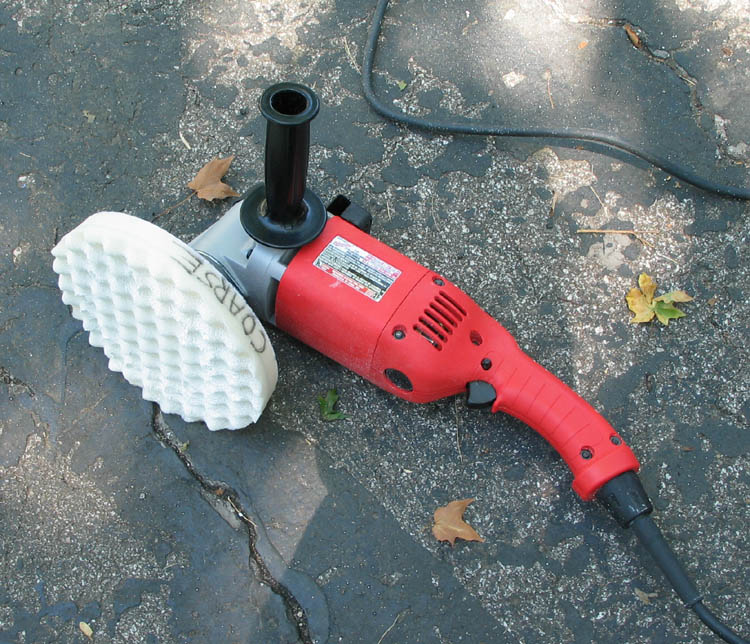
Well my despair at the dirt and runs in the paint has gone to cautious optimism. The pictures don't show what I'm talking about but trust me there was a lot. Last night I sanded down the runs (only sanded through in one place! see the circled area below) and bought a new buffer. The buffer worked really well and I have been back over it all once. Still a few areas that look hazy to figure out how to handle but all in all much much better. I am using 3M Perfect-It III Extra Cut Rubbing Compound with a 3M Foam Compounding Pad. Most of the sanding was done with 1500 grit wet sand paper, but the runs were worked first with coarser stuff. The paint shop guys were right, the clear gets very hard after 24-36 hours.
July 18th, 2004
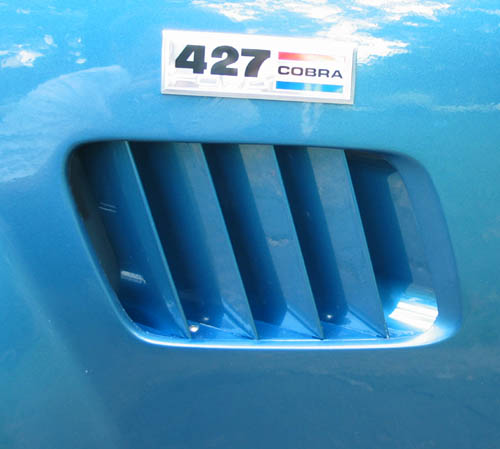
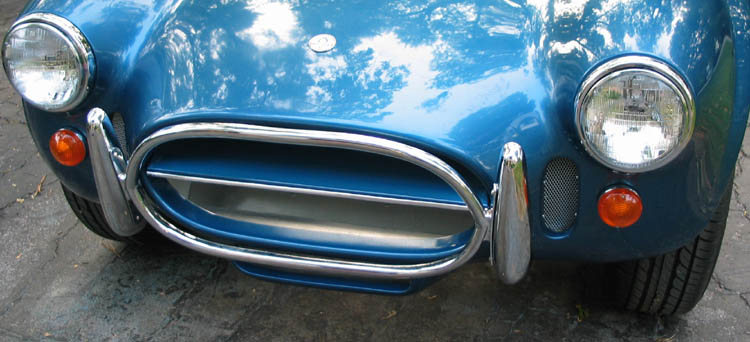
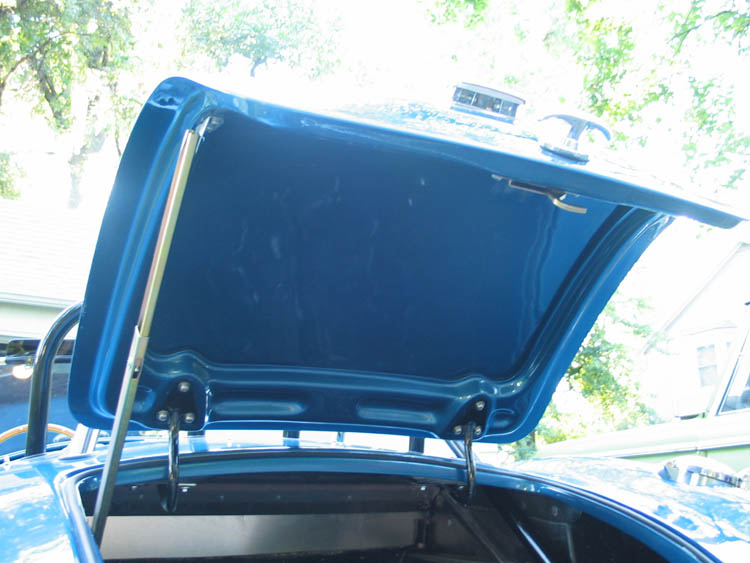
Made some more progress on the cobra body work this weekend. The inside of the hood and trunk lid have some rough bare fiberglass areas in them that I want to fill and and smooth before painting. So I masked off those areas and sprayed them with a product called Evercoat Slick Sand. It's a polyester filler much like the Standox product I used on the main body, but much cheaper. Standox is like $50 / quart and this stuff is $60 / gallon. Because of the depth of fill required I was reluctant to use Standox on these parts. The guy at the auto paint store that paints fiberglass monster truck bodies every week recommended this product so I felt pretty confident it would work. I also painted 3 detail parts that are specific to a "street" style cobra. The grill splitter is a wing shaped piece of tin that goes into the grill opening and directs the air through the radiator. On the SC or race looking cars you usually see two fans in that location but the street cars have this body color painted piece of tin with a chrome strip on the edge. I also painted the side vents (gills) which are painted on the street cars but usually bare aluminum on the race cars. The painting went pretty well on the small stuff, I think I will be able to do a real nice job on the hood, trunk and doors. There is a very fine line when spraying the clear between wet and dripping. I'm still planning how to paint the remaining parts. I think it's best to spray them in their as installed orientation so that the grain of the metallic lays out correctly, if not I'm afraid one panel will look dark when the other looks light and vice versa. Could be folklore and urban legend but it makes some sense to me.
July 20th, 2004
Well filling the rough inside panels of the hood and trunk turned out to be one of those things that actually ended up being easier than I expected. Charlie Bolinger recommended this method and once again he's a pretty smart guy. The Evercoat Slick Sand product worked pretty... well... slick. I masked off everything but those areas and sprayed the stuff on as thick as I could. Then using a DA with 150 grit paper sanded it down so that it was smooth. The tighter radius of the inside of the trunk required a smaller DA wheel. I got a 3" one today (the normal one is 6") and that worked great. Next I'll spray the the whole part with Slick Sand and block sand the outside. Then they should be ready to paint.
August 3rd, 2004
I have this week off work but unfortunately the temperature has been pretty hot. Highs in the mid 90s and lows in the mid 70s. I was able to get the hood painted yesterday and it worked out pretty well. It's really too bad I'm still experimenting with all of this. The hardest thing for me is trying to get this clear figured out, specifically how you shoot it without runs. I painted the hood hanging vertically. I wanted to paint it laying flat but couldn't figure out how to paint both sides and not leave a masking line. That turned out to be an okay way to do it. This time spraying the clear I didn't go full wet on the first coat, then tried to go full wet on the second. That worked a little better but I still got one sag and lots of orange peel. This morning was prime polishing time so I got up and did it by the book. I wet sanded with 1500 and the orange peel came out fairly easily. Then wet sanded with 2000 and polished with 3M Perfect It rubbing compound (not the fast cut, the milder one). I was really happy with the results. The inside of the hood turned out nice too, I doubt I'll polish it. I wanted the hood to be as nice as I could make it because on this car it's HUGE. With no hood scoop or stripes to break it up it's really the largest continuous panel on the car.
August 5th, 2004
I finished the trunk lid over the last couple of days and it is the first part that I would say is near perfect! Since Wendi had gone back to work on Wednesday I adjusted my working on the cobra schedule to the early morning before the rest of the family got up. I _really_ like painting in the morning, the paint sprayed much nicer for some reason, probably the temperature which was a little below 80. My argument with the clear continued and this time I got by with only orange peel and no runs. I think, for me, the goal should be no runs with some orange peel being acceptable. If you wet sand (1500 then 2000) it within 24 hours orange peel comes out surprisingly easy. I've come to plan on spending time sanding and polishing within the 12 - 24 hour period after spraying the clear.
Bad news though, after looking at it in the bright sunlight there is a problem with the hood. There are some spots that look like have poor coverage of the base coat, you can see the blue primer through it. But only in the bright sunlight and from certain angles. There is a spot with the same problem on the left rear fender. I guess I will repaint them sometime. The paint store guy says I can just scuff them up with 400 grit paper and reshoot them. That would be easy with the hood, I could mask off and just do the top. But I don't really know how to do that with the fender?
My neighbor from down the street from England came over to inspect the work and correct my pronunciation. The part I was working on was the "boot" and not the trunk lid. He also corrected me on the bonnet and the wings (fenders).
Starting on the doors in the morning, wish me luck!
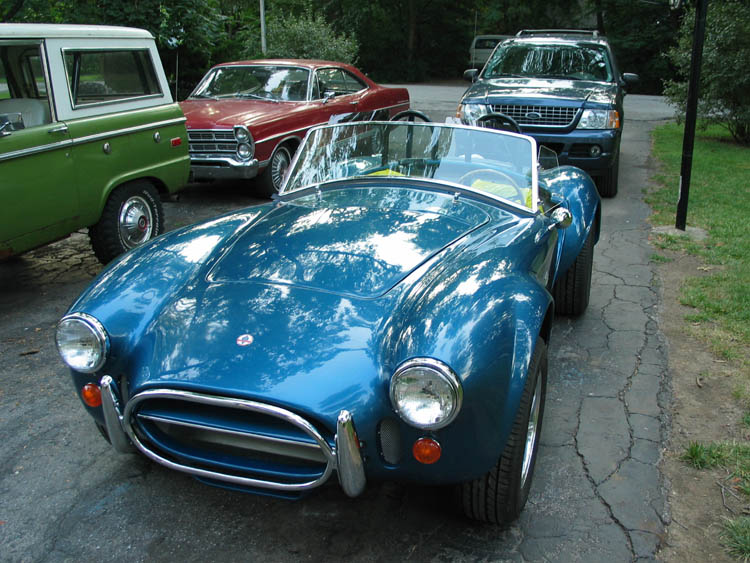
August 9th, 2004
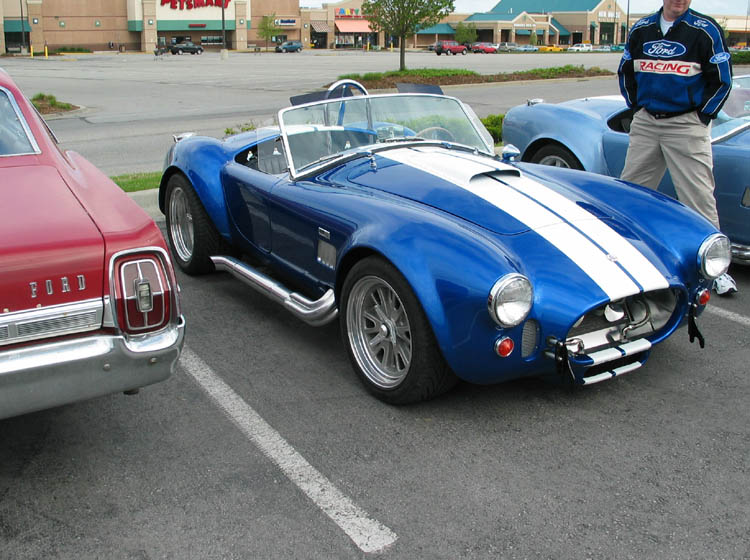
Well, it's all blue now! It may not be perfect but I am so happy to be done with painting for a while. I can now proceed with the motor build which for me is much more fun. Painting the doors went pretty well. I got a little cocky with the clear and had some runs on Wendi's door. Mine came out with a little orange peel, but not too bad. Of course as is typical, with the very last part to be painted (my door) I figured out what I was doing wrong with the clear all the time. I was not waiting long enough between coats! The instructions say 10-15 minutes between coats, and when you are doing it you think you know how long that is. But this time I actually timed it and I'm pretty sure I was always on it before that. I think a cooking timer would be a real useful addition to the paint equipment. I'm sure it's still very tricky but it would be much less tricky if you put down a slightly wet coat, waited the correct timeframe and then tried for smooth. I think you should still error in favor of orange peel rather than runs and sags. I have lots of spot repairs to make so I'm sure I will learn more about how to shoot clear, but I'm willing to wait for next spring or summer to do that, right now I want to get it on the road.