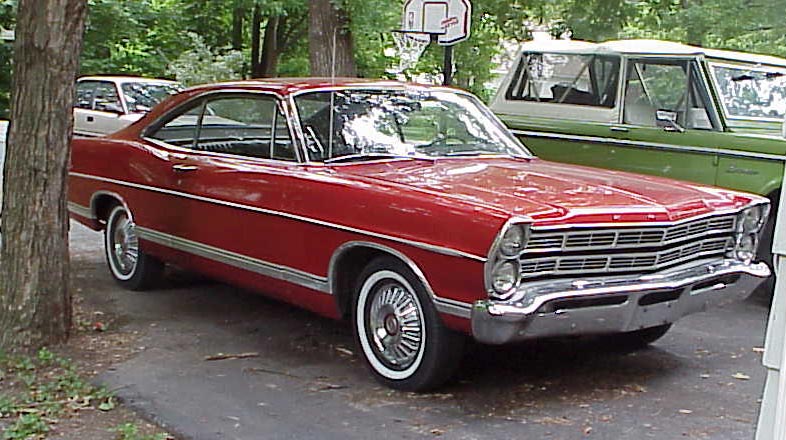
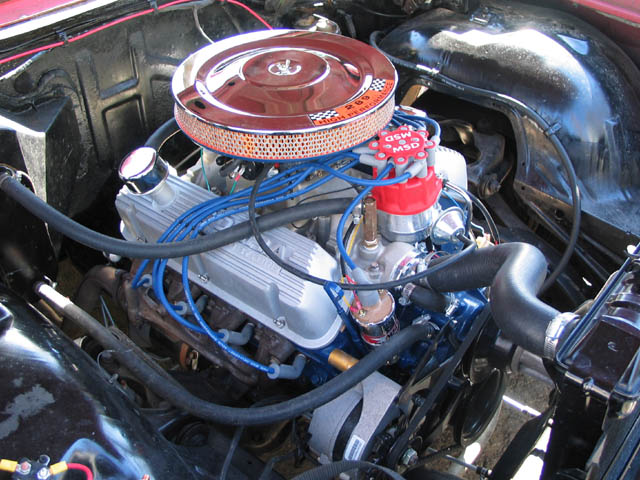
Red Car
Red Car is my father's '67 Galaxie 2 door hardtop. It is a fairly plain optioned car (no power steering or brakes, 289 3spd on the column) with flashy red paint and black interior. Last February it got parked due to a problem with the timing chain. I'm not sure what happened first but the timing chain nylon sprocket shelled out, camshaft broke and several valves were bent. We decided to rebuild the stock 289 and convert it to a later automatic overdrive transmission so Wendi can drive it. I have been working on it hard for the last couple of weeks and it is almost ready to fire. I still need to fabricate the shift linkage, shorten the driveshaft, wire up a new set of gages, fabricate the TV cable mount (the equivalent of the kickdown linkage for the AOD). My goal is to at least have it running and get the cam broke in before going back to work on January 5th.
January 2nd, 2004
Because we are installing an AOD transmission rather that the C4 that could have come from the factory in the red car, I had to fabricate the shift linkage. This proved more complicated than I had originally thought and ended up taking a couple of days to complete. Here is the finished linkage ready to paint.
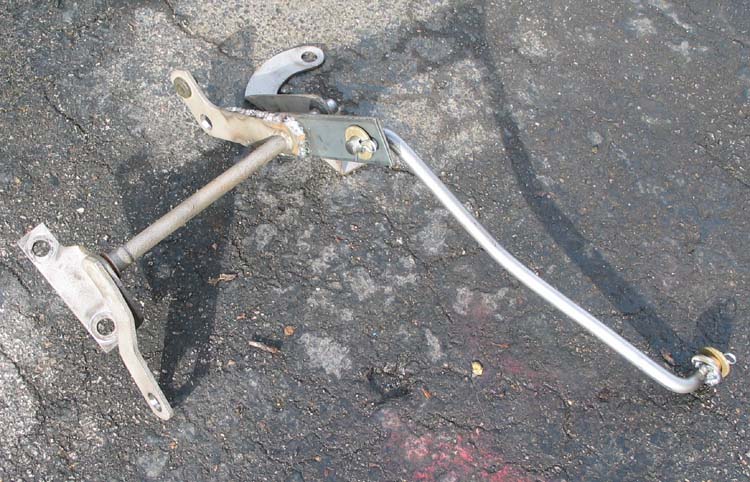
The first problem was that I could not find the grommets needed for the various pivots here in town, after several trips to Strasser Hardware I came up with equivalents made out of bronze bushings and rubber grommets with e-clips, cotter pins and washers. The next problem was that the shift lever on the C4 hangs down while the shift lever on our AOD points up. That required the arm on the cross bar be on top rather than the bottom of the bar so I fabricated a new arm to weld to the old as you can see in the picture. I calculated the length of the arm by considering that the arm on the AOD is about 2 1/4" long and moves through a 58 degree arc. The arm on the cross bar moves through a 48 degree arc so by solving for radius of the shifter arm based on the arc length of the transmission end I came up with a radius of 2.70". Next I had to fabricate the link that runs from the new arm to the transmission. I actually went through two iterations of it. My first attempt was made with the idea that in neutral the two arms should be parallel. That one didn't work because at the 1st gear end the linkage was binding with the transmission bracket. So I had to shorten it up about an inch. The final form feels like it works correctly, we'll just have to see when we actually get it on the road.
February 29th, 2004
It's funny how things turn out sometimes. The last two items I have done on Red Car have been "boy that was a lot easier than I thought it would be". The first was last week, I was putting the speedometer cable together. Amazingly the speedometer cable fitting is the same from '67 as the AOD had in the late 80s. All I had to do was remove the old speedo gear and put on the one from the AOD. Then today I was going to measure the dimension requested by "Precision Built" the local company who was willing to shorten my driveshaft. I measured it and dug out the driveshaft, and measured it... hmmm... that's pretty close to the right length. The information I had said it would need to be shortened 2" or so. So I measured with the yoke installed this time and it came out perfect. My theory is that the C4s used in big cars had longer tail shafts than mustangs. So then I went to napa and got U-joints for a '67 galaxie not knowing if they would work for the '85 mustang yoke I was installing. But they worked fine too. So drive shaft is now on and I lowered the car off the car ramps it had been sitting on since fall sometime. The only things remaining before firing it up are to fabricate a mount for the the TV (transmission kick down) cable, wire up the new autometer gages, install the coil, and wire up the MSD distributor. It's getting close!!
March 3rd, 2004
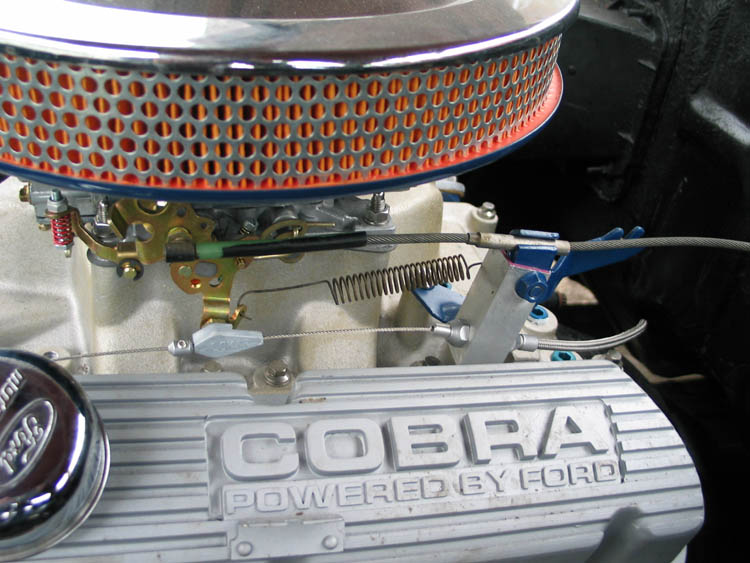
Over lunch I fabricated the mount for the Lokar TV cable out of a piece of aluminum angle. It isn't fancy but the cable is where I wanted it to be and it only took a couple of minutes to make. It's bolted to the stock throttle cable mount. Wiring is all that's left I think...
March 6th, 2004
It's Alive!!! I finished the wiring last week at lunch and early evenings. Today we got it running really well and drove it around town a little. But what a dramatic day it was! The first issue was I tried the brakes first (good idea huh) and the pedal felt like nothing was attached but the reservoirs were full. Kind of a head scratcher but my trusty brake bleeding buddy Duncan pumped it silly, and after bleeding all the wheels it is now back to normal. Then we had a few little details to take care of like getting gas and plugging some vacuum ports on the carburetor (first trip to NAPA of the day). Next we put an old distributor shaft in the drill and ran the oil pump to pre-lube the motor. Duncan reported 50psi on the gage which seemed about right. Stabbed the distributor and installed the plug wires and it was getting close. Then we filled the float bowl of the carburetor with gas so we didn't have to wait for the pump, used a squirt type oil can for that. The plan was to run the engine above 1500 rpm for 30 minutes to break in the cam, per instructions from Crane. I just put the distributor where I thought a little advanced would be and it started right off! But the starter didn't disengage, I jumped out of the car and took the positive battery cable off to get it to stop cranking. The tester showed the solenoid had welded it self together. I knew there was some reason I brought out the fire extinguisher, just in case. So that was the second trip to NAPA, Audrey came along and impressed the counter guy by saying NAPA in her sweet voice. He then prompted her to say HEMI just like in the commercial, dang she's cute :). Solenoid fixed the problem and the car started right up and I was able to get it to settle in to a fast idle which I varied every so often during the 30 minutes. Actually it turned out to be about 27 minutes because at that point the lower radiator hose blew off giving the engine it's first antifreeze bath of the day. It was running a little hot too, about 210 degrees. So that started the third NAPA trip of the day to get hoses and a voltage regulator (it wasn't charging). So with the new lower hose on I went to do some tuning at idle. I found the timing was really off and the radiator boiled over (second antifreeze bath), I may not have gotten all the water back in, but at this point I was pretty worried. I let it cool off. After it was down to 160 degrees or so, I filled it with water and antifreeze again and started it and set the timing to a conservative 10 degrees with vacuum off and plugged. Set the idle around 800 rpm, checked the float levels and set the idle mixture with a vacuum gage. Everything was working great at that point, temp right at 200 degrees, it idles smooth and runs good. I think the transmission is shifting as it should, it's smooth but I don't have a tach in there. So far I'm tickled with how it turned out.
March 7th, 2004
It's really alive now! I think I'm ready to stick a fork in it now. Dealt with several issues this morning. First was that the transmission was slipping right off the start. It was the adjustment of the TV cable, I had not re-adjusted it after setting the idle and there was maybe 1/8" of slack in it. I can't and most articles don't emphasize enough that the adjustment of this cable is critical to the life of the transmission. Once I adjusted it to remove all the slack it started working great. Also the gas line was leaking, I replaced the snap clamps with worm clamps and it's fine now. Then Duncan and I bled the front brakes again and we now have a high hard pedal. The final issue was the alternator was not charging, it turned out I had wired it wrong when I put the rebuilt one and had the stator and field reversed. And it was all accomplished with 0 trips to NAPA! (I did get the fuel line clamps at KMart however).
April 3rd, 2004
I've still been tinkering with Red Car but it's really almost done now. The transmission gave me fits for quite a while. It would work great some times then not shift other times. I honestly was almost ready to give up and assume I had toasted it with the slack TV cable at first. You really need this cable to be right. A couple of things proved to be the key here. The first was a cable bracket I bought from http://www.sonnax.com that corrects the geometry with the holley carburetor and the Lokar AOD cable. The part numbers are AS2-02K for the bracket and AS1-01K1 for a spring to allow the cable to extend if your adjustment would limit wide open throttle. You can order them online at http://www.powerglide.com/parts/AODE.htm . The spring is unfortunately a bit weak in comparison to the built in spring of the lokar cable, I may have to replace it. The other thing that helped was just trying different settings. The way they tell you to adjust the cable is more pulled out will cause later harder shifts and less will cause earlier softer shifts. Well mine was psychotic in that it would do late hard shifts sometimes but what I found is that I needed more cable pulled out for it to act normal. I've also been working on the distributor. I decided to remove the vacuum advance because it acted like it was coming in when I didn't want it. The MSD distributor came with a lockout kit that lets you remove the vacuum advance so I did that, and after all the K-code 289 which we are trying to look like didn't have vacuum advance either. I also put in the 2 blue springs which gets all the advance in by 3000 rpm. Right now I'm running 15 degrees initial + 21 degrees centrifugal advance for a total of 36. That really woke the motor up. I've been driving the car every day and am really happy with how it has turned out.
May 21st, 2004
Red car is working out well as a daily driver. The transmission, after a great deal of fiddling with the TV cable is working great. Two nagging concerns remain that I plan to work on in the next few days. There is still a fair amount of valve train noise, one theory presented by someone on one of the forums is that it may be pushrod length. The Ferrea valves we used in rebuilding the heads were longer than stock and that may have thrown off the geometry enough to be noisy. It's also important to get it right for valve stem wear. A good article on it is Trick Flow Push Rod Length Article. To do the job I bought some awesome checking pushrods from www.goodson.com, they are things of beauty. The other issue is I think it's running a little rich, the car tends to "chug" at low to mid RPMs, I think I will try going down 2 jets on the carburetor and see what effect it has.
May 26th, 2004
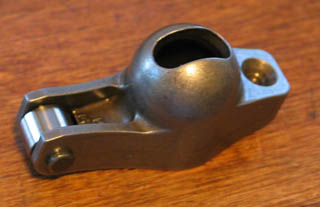
Well that was... interesting. Over lunch I decided to investigate the theory that the noisy valve train was caused by the wrong pushrod length. I measured the wear pattern as it is, it was fairly well centered (a little towards the outside) but wider than it should be. It measured 0.16 whereas the goal was 0.08. So in theory we would need longer pushrods. I had limited time but using my checking pushrod I tried (stock is 6 7/8") 7" and 7 1/16". The 7" produced a wear pattern of 0.14 and moved it decidedly to the outside. 7 1/6" produced 0.13" and also to the outside. And at this length we were almost out of threads on the rocker stud. Ideally I would probably change rockers and get custom pushrods. Unfortunately to run roller rockers I would have to have the heads machined for screw in rocker studs and pushrod guide plates. The rail type stock rocker is probably the only choice, but I will research that. I guess I should also try shorter pushrod length but then I think I will get into rocker to spring retainer interference. I may in the long run just have to turn up the radio... UPDATE: Did some research and at least 2 manufacturers make roller rockers that work with rail type (no pushrod guide plates) valve train.
Probe Industries part # 12328 looks like this
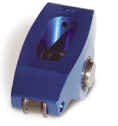 but
they are pretty pricey at $269 a set. Note the "sideboards" on the roller tip.
More reasonable (only $25 more than stock) are the Comp Cams # 1431-16 which
look like this
but
they are pretty pricey at $269 a set. Note the "sideboards" on the roller tip.
More reasonable (only $25 more than stock) are the Comp Cams # 1431-16 which
look like this
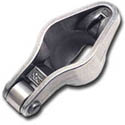 at $145 a set. I'm not sure how the rail feature works, this picture appears to
be a normal one. I'm going to order the Comp Cams ones later this week, then
I'll revisit the pushrod length issue. My feeling is that centered is more
important than the width of the wear spot.
at $145 a set. I'm not sure how the rail feature works, this picture appears to
be a normal one. I'm going to order the Comp Cams ones later this week, then
I'll revisit the pushrod length issue. My feeling is that centered is more
important than the width of the wear spot.
June 3rd-4th, 2004
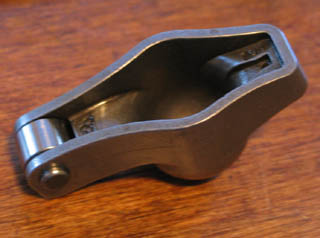
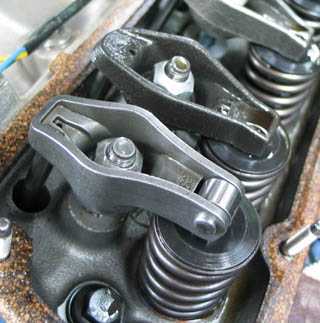
Got the Comp Cams Magnum Roller Rockers today. They look nice, note the little ears that provide the "rail" to use the valve tip to locate the rocker and pushrod. I checked the pattern tonight and it is better for width, about the same for position on the tip. The new width is 0.076" which is within the 0.080" spec. But it appears that I need shorter push rods to get the pattern more centered on the valve stem. The pushrods that are in there are actually 6.905" pushrods from the '74 302. I went with the longer push rods because it looked like the old rockers would rub on the spring retainers. I'll try the shorter 289 pushrod length of 6.825" and see what that looks like.
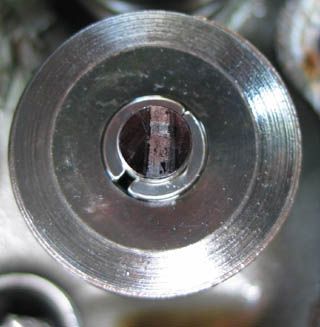
Tip Pattern from 6.905" pushrod with Comp Roller Tip Rockers 0.075" wide

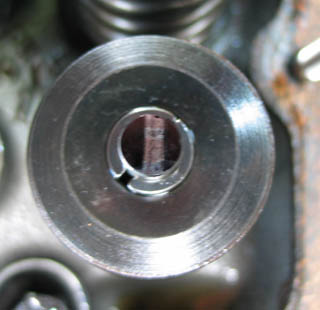
Tip Pattern with 6.825" pushrod - more centered but wider 0.085"
Tip Pattern with 6.812" pushrod - even more centered but still wider 0.090"
I just ordered a Comp Cams 6.816" pushrod set part # 7827-16. Seems like a good compromise in a standard size. Summit had them for $33 which is cheaper than NAPA for the 6.825" ones which were $55.
June 13th, 2004
I finally got around to putting in the Comp Cams Roller tip rockers and shorter pushrods today. The first thing I discovered is that Comp Cams lists their pushrod length by "effective length" rather than "overall length" like most everyone else. So the 6.816" pushrods are actually more like 6.825" which is stock 289 length. But that is fine and the pattern is much better and approximately 0.09" wide. I could have gotten shorter custom pushrods which would be expensive. While that would have perfectly centered the pattern it would also have made the pattern wider which is also bad. Seems like a good tradeoff / compromise. The existing configuration is wrong on both counts but not by much. And all of this started because the Crane spring retainers have a ridge on them that would have rubbed the stock rockers with the shorter pushrods. Then I followed the directions (I actually read them now can you believe it?) and washed all the rocker parts and pushrods in hot soapy water (in the kitchen sink - don't tell Wendi). I was amazed at lots of machining debris that washed out, I'm glad I did it. Initial test drives have shown the valve train to be much quieter now, I'm not hearing the "solid lifter" sound like I was before, seems like I can check that problem off the list. I still think the carb is a little rich.

Another interesting thing happened over the weekend. Saturday we were having a garage sale and mostly as a joke I put price tags on the red car and the bronco. I also put up short descriptions of what had been done to them etc. Well someone called my bluff. A fella named Carlos who buys cars up here at auction and drives them to Mexico stopped by and wanted to buy red car. He was also interested in the bronco so I shot him a price for both. He claims he'll be back next week to buy them but we'll see. If that happens I may be looking for a Fairlane sooner than later, I'll be needing something to drive.
January 1st, 2005
I had been having some disturbing valve train noises in red car lately. Some mornings there would be some clatter at start up which would go away within a few seconds. Then the other day it didn't go away so I assumed there was a bent pushrod or something. I suspected the crane lifters just never were right which caused all the valve train noise from the beginning. And I hoped at the time that the cam wasn't going flat which would require a full engine teardown to clean up all the shavings. Since I had the entire week off between Christmas and New Years I decided to change cam and lifters in red car. When I started taking it apart I found a rocker had jumped off the valve.
I never thought the Crane H-266-2 ran well enough to suit me so I started looking at the Comp Cams catalog and found a similar dual pattern cam that has more legs to it. Slightly more lift but slightly shorter duration. The one I ended up with is Comp Cams XE256H-10. Here is the desktop dyno comparison between the two.
I got the car put back together Friday morning and broke the cam in for 15 minutes around 2500 rpm. It actually seems better off idle than the other cam. Valve train noise is still there a little but I don't think as bad. We'll see how it is to live with.